
Happy Blues
When this berry is in season, everything turns blue. In a happy way (Ingredient Special on Blueberries plus Recipe ‘Secret Mission Number Blue’, Rcp# 45).
Aside from the many forms of water, blue is a very rare color in nature. There may be a some feathers and a very few flower petals, but in general, the hue is not seen very often in anything that grows on the ground. This may be one of the reasons why the berries named after this color are so unique.
The original blueberries grew in or near forests on slightly acidic, moist soils. That is why the German name for wild blueberries is “Heidelbeeren” (heath berries). And they like the slightly acidic soil, so I group them with rose cuttings that I am trying to get to root to have new rose plants (you can never have too many roses ;-)). Later in the year, of course, I separate them, because to grow the fruit, the blueberry plants love it a little more sour at the feet than the roses.
This subtle sourness and its kind of earthy note is why I use blueberries a lot in making food (see [Blueberry Spy Pot] or [Multi-Meal Prep II – The Sequel]). These berries blend in with many flavors, but also round out certain notes of other ingredients perfectly. Salads are an excellent example (try combining blueberries with herbed tofu and green olives on a dark leaf salad – delicious).
But somehow blueberries are also one of the elemental flavors of summer for me. Sunshine, street concerts, something fresh to cool you down (you should try the blueberry lassi at the VUX in Rixdorf – yummy→ [Place with a View: VUX, Berlin]), some rose tea with a blueberry cake out on the balcony … .
That’s what I call a happy summer blues.
Side Notes
- I have not mentioned the health benefits of the special ingredient this time, because literally everyone knows that these little blue rollers are very good for you. We are talking about cardiovascular health, blood pressure, brain, stomach, etc. . The well-known clinics and some prestigious universities around the globe that provide public nutritional advice online sing the praises of blueberries (for example, the Harvard T.H. Chan School of Public Health or Kings College in London, just to name a few sources in English).
- Of course, I could not do without a blueberry cheesecake recipe to accompany this post. You’ll find it below.
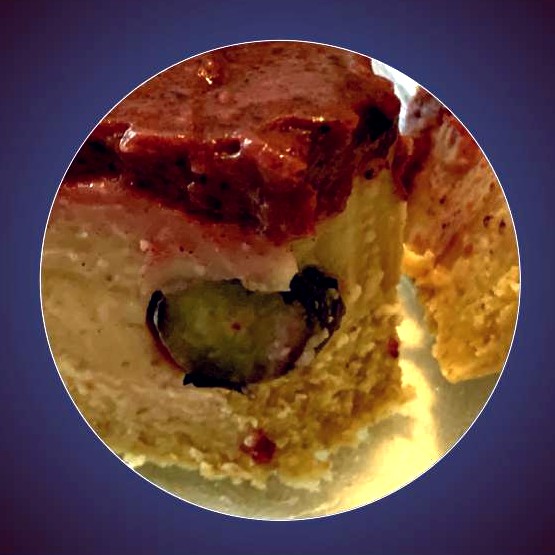
Secret Mission Number Blue
The blue guys are on the roll again. This time they are hiding in a Cheesecake (with Ingredient Special on Blueberries, Rcp# 45).
Ingredients for ‘Secret Mission Number Blue’
For the Cake Base
- 20-22 cookies (170-180g, butter cookie style, I use spelt oatmeal cookies with 30% sugar and 25% fat)
- ½ tablespoon virgin coconut oil
- 1 ½ tablespoons cocoa butter drops/chips
- 1 pinch ground vanilla powder
- An adjustable cake ring (you’ll need an 18cm diameter for this recipe)
- A flat metal cake platform
- Baking paper (heavy weight)
For the Cheesecake Layer
- 2 tablespoons dried elderberry flower tea (pure dried flowers)
- 4 – 5 fresh rosemary needles
- 10 – 12 fresh lemon balm leaves (or 1 teaspoon dried lemon balm leaves)
- 150g mild plant-based feta, frozen a day or two ahead and thawed in the fridge before preparing the cake (feta made from coconut and/or almonds)
- 45 – 50 fresh blueberries (must be crisp and not too soft)
- 3 tablespoons dried blueberries
- 50 g vanilla pudding powder (about 8 tablespoons, 35 – 40 g is usually the amount needed for 500 ml liquid – from cow or plant/nut)
- 4 tablespoons date sugar (crystallized sugar made from dates, available at health food or organic stores)
- 5 tablespoons coconut blossom sugar (crystallized sugar made from coconut flower nectar, available at health food stores)
- 1 large container of oat yogurt (400g)
- 1 tablespoon canola oil
- ½ teaspoon lime juice
- Knife tip of ground vanilla powder
Preparations for ‘Secret Mission Number Blue’
Step One: Basic Preparations
- Place two tablespoons of dried elderberry flowers in a paper tea bag and put it in a heat resistant fat-free bowl. Wash the rosemary needles and fresh lemon balm leaves and put them in another paper tea bag. Scald both bags with 300 ml of boiling water. Allow the tea to infuse and cool completely before removing the tea bags. Leave the bowl covered but with an opening during preparation and cooling (to keep out flies, etc.). When finished, take 5 tablespoons and set aside to cool in the refrigerator. The rest (should be about 200 ml) can be used at room temperature to make the cheesecake (if you are making the tea and the cheesecake on the same day, otherwise refrigerate separately).
- Make sure the plant-based feta is completely thawed in the fridge, if not, take it out to complete the defrosting, but do not let it get warm (put it back in the fridge if the preparation takes too long).
- Wash the blueberries and sort out any bruised or damaged ones, making sure you have about 45 good and crisp berries for the cake. Place them in a covered bowl with a clean cloth on the bottom to absorb the liquid and keep the berries fresh. Store in the refrigerator.
Step Two: The Cake Base
- Crumble the cookies thoroughly in a medium bowl (1.2 liters), there should be no larger crumbles left (like breading flour). Add 3 tablespoons of oat yogurt, a pinch of ground vanilla powder and mix well. Allow the crumbles to absorb the liquid completely.
- Fill a 1 ½ liter sauce pot to the half with boiling water (make sure the pot is standing safely!). Then hang a smaller pot over the edge of the pot with the hot water.You have to be able to safely attach the rim of the smaller pot to the edge of the bigger one without the smaller pot falling in (classic “water bath”). The smaller pot cannot touch the hot liquid below. Put the coconut oil in the smaller pot and let it dissolve to its liquid form, then add the cocoa butter drops to melt.
- Pour the melted oils into the bowl with the soaked cookie crumbles and stir well. Allow the crumbles to absorb the oil and cool for 5 minutes.
- Adjust the cake ring to 18 cm and place it on the cake platform on a layer of baking paper. Spread the cake base mixture evenly inside the cake ring on the platform.
- Immediately place in the refrigerator to cool completely and firm up.
Step Three: Preparing the Cheesecake Mass
- Take 200 ml of the elderberry flower tea (see Basic Preparations, step one above) and put it in a saucepan that holds about 1 ½ liters. Heat up with 1 tablespoon of canola oil added. After a brief boil, reduce heat to low and add the crumbled feta. Stir to create a smooth sauce and be careful not to let it burn. Turn off the heat completely and remove from the heat after all the feta has melted and add the lime juice, 3 tablespoons of the date sugar and 4 tablespoons of the coconut blossom sugar. Stir well to create a smooth sauce.
- Mix the small and completely cooled remainder of the tea (5 tablespoons) with 3 tablespoons of oat yogurt and a knife tip of ground vanilla powder. Then stir in the vanilla pudding powder in small batches to avoid lumps until you have a smooth sauce.
- Stir the dissolved pudding powder into the ‘cheese sauce’. Treating this cheese sauce like the “milk” on the back of the pudding package, heat the “pudding” in the saucepan until it begins to thicken noticeably. Keep an eye on the sides of the pan and stir there so that the sauce does not stick to the sides. Then remove from heat.
- Take 7 tablespoons of the hot pudding mixture and place it in a small heat-resistant bowl (put it on a wet cloth to make sure). Pour the rest of the pudding mixture into a large heat-resistant bowl made of glass, stoneware or porcelain (again, put on a damp cloth to prevent the bowl from cracking, this cannot be made of earthenware or metal, see side notes below for explanations).
- Immediately store the large bowl in a cool place (not the refrigerator, but a cool room) and cover it with a colander. Leave some space between the bottom of the bowl and the surface on which you are placing it, using a wet cloth to equalize the heat difference. This must cool down until the bottom of the bowl is no more than lukewarm (very important, otherwise it might turn sour!).
- Place the small bowl in another bowl with cold water in the bottom, where it can stand safely and the pudding mix can cool. After the pudding mix in the small bowl has cooled to lukewarm, place it in the refrigerator.
- Crush 3 tablespoons of dried blueberries and mix with 1 tablespoon of date sugar. Make sure there are no lumps and that all the berries are crushed, then scald with 100 ml of boiling water in a heat-resistant bowl. Stir well to get an even sauce. Allow to cool to lukewarm, then place in the refrigerator to cool completely.
Step Four: Assembling the Cake (Phase One)
- Carefully fold 12 tablespoons of cold oat yogurt into the cooled pudding from the large bowl. (The bottom of the bowl cannot be warmer than lukewarm, or it will turn sour, especially in warm weather.)
- Spoon enough of the pudding onto the base inside the cake ring to cover it about 2 cm high.
- Spread 20-25 blueberries evenly over the mixture. Turn them ‘upside down’ (so you can see the little star where the flower used to be). This way the fruit is more stable and won’t crush so easily).
- Spread the rest of the pudding mix inside the cake ring.
- Refrigerate the cake for 10-15 minutes (the cheesecake mixture needs to set a bit).
Step Five: Assembling the Cake (Finish)
- Carefully mix two tablespoons of the oat yogurt with the hardened and completely cooled pudding mix in the small bowl (taken from the refrigerator). Then add the cooled blueberry sauce and stir gently until smooth. Do not stir too hard or it will liquefy completely.
- Remove the cake with the cooled cheesecake mix from the refrigerator. Sprinkle 20-25 blueberries over the top. Make sure you do not use the same pattern as before (you can feel if there is a berry underneath). When you are satisfied with the pattern, gently press the berries in as if hiding them in the cake mixture.
- Pour the cooled dark blueberry pudding mix over the cake and spread evenly. Make sure the top looks nice (swirl with a spoon) because that is what the cake will look like later. Refrigerate the cake for at least 6 hours (I usually let it rest overnight so it’s easy to cut).
Side Notes:
- I love this cake. It took me a while to figure out the recipe, but it sure was worth the effort!
- If your cheesecake mixture turns sour for any reason: Please do not try to eat it. You will seriously upset your stomach! This also applies to any other unwanted acidification of food, such as a soup or other dish that has turned sour. This is the main reason why I always point out that it’s a good idea to leave a spoon between the edge of the pot and the lid if you’re not cooking the contents, but just letting them settle or cool slowly (to avoid clogged cooling and heat buildup, which encourages the brewing/souring process). Other factors that cause food to go sour include certain ingredients that simply do not like too much acid (certain dairy products or some flours made from beans) and hot weather or even an approaching thunderstorm. A big problem are blocked cooling processes (the wooden spoon thing). That’s why I recommended not using a metal or earthenware bowl for the cheese mixture in the recipe above. Also, if you know you are dealing with a tricky recipe, I would always try to work with equipment that is as clean as possible so that no residue from other cooking activities (fat, acid, unstable sugars) will interfere with the preparations at hand.

Please note: For all my recipes (text) on this blog (By MagS, Parsley-Lane Blog) I grant a CC license under the terms of BY-NC-SA 4.0 (Attribution-NonCommercial-ShareAlike). For further explanations, please see the Legal Notice or visit creativecommons.org.